Easy DIY Halloween Decorations
Last updated: March 1st, 2021 Published on: October 11, 2019Transform your home from the inside out in a low-cost way with our innovative DIY Halloween decoration ideas! We will guide you step by step to help you create both a spooky home interior and exterior décor – perfect for everyone to know that you’re welcoming trick-or-treaters this year.
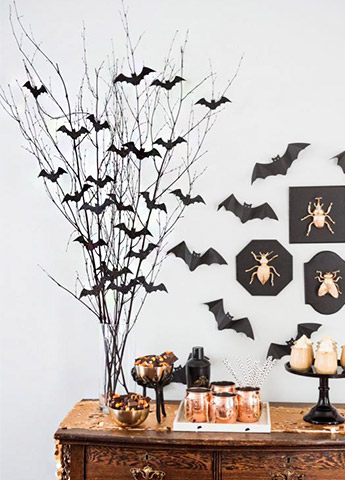
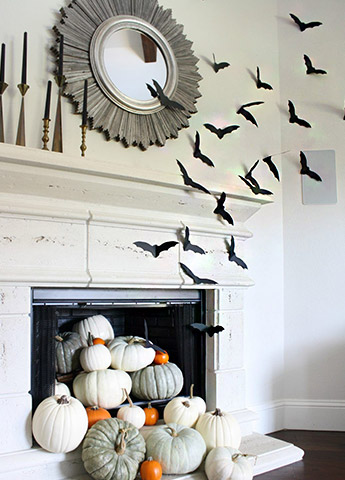
Paper Bats
Batman fan or not, bats are mysterious nocturnal creatures which are always an easy choice for Halloween. To make a cool indoor effect you could place them with some blue tack all over your fireplace to make it look like they’re escaping. Or you can cut out smaller ones and hang them on some of your backyard branches to form a centrepiece to keep on your main dining table.
Materials You’ll Need
✔ Black paper
✔ Pair of scissors
✔ Bat shaped stencils/cut-outs
Method
Step 1 – Download and print a bat shaped stencil.
Step 2 – Use the stencil to cut multiple bats in either plain black paper or black crepe paper.
Step 3 – Use blue tack to stick them to the fireplace or glue guns to spread them on the branches of your centrepiece.
Find further details to how to make these two DIY paper bats ideas on Cyd’s blog for the centrepiece, and on Shelley’s blog for the fireplace bats.
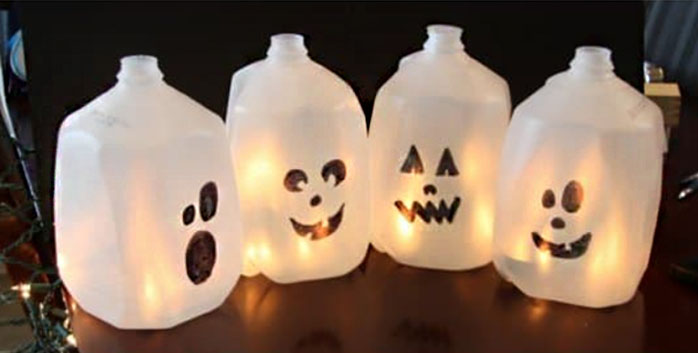
Ghost Bottles
Recycle your milk bottles and make some glowing ghosts out of them – perfect to place outside the house, and guide your little guests to the front door.
Materials You’ll Need
✔ Plastic white empty milk bottles
✔ Sharpie marker
✔ Small rocks /cut-outs
✔ £1 Glow sticks
Method
Step 1 – Rinse and dry your empty milk bottles.
Step 2 – Take your sharpie and sketch out funny ghost faces.
Step 3 – Fill the bottle with small rocks to make the milk bottle heavier (so it doesn’t fly around to the neighbour’s house if it gets windy).
Step 4 – Crack a glow stick or two to place inside.
If you’d rather use mini lights instead of glow sticks, just follow Jennifer’s step by step blog here.
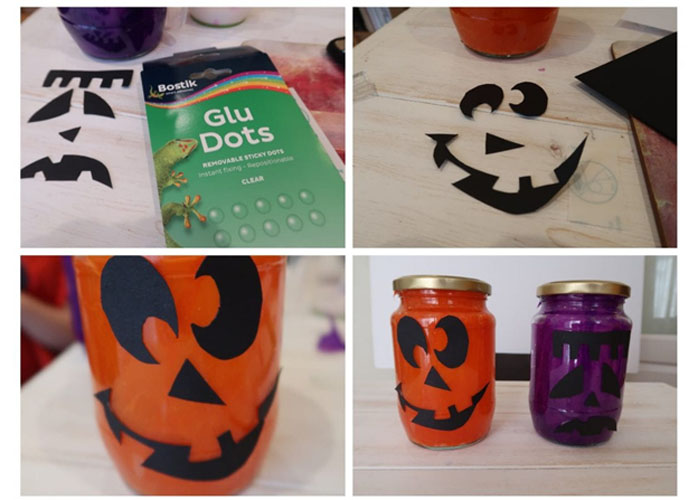
Pumpkin Jack-O-Lanterns
Looking for a lantern to make with the kids? This jar lantern craft idea by Danielle is a tried and tested DIY kids friendly idea – perfect to give any of your cooking jars a second use.
Materials You’ll Need
✔ Large jars – as many as you want to make
✔ Tissue or crepe paper in colours of your choice
✔ PVA/white glue
✔ Black card
✔ Scissors/craft knife
✔ Glue dots
✔ Electric/battery powered tea lights
Method
Step 1 – Wash and dry your jars – remove any labels.
Step 2 – Cover the inside of your jar with a thin layer of PVA white glue and add the tissue paper of your choice.
Step 3 – Cut out the face design you’d like on the black card with scissors or a craft knife.
Step 4 – Use glue dots to stick the faces on the front of the jars.
Step 5 – When the inside glue is dry, add the tea light.
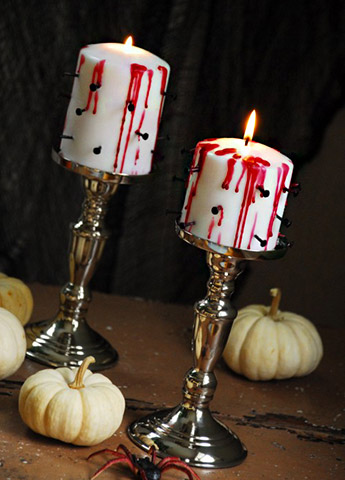
Macabre Candles
Camilla bleeding looking candles are so easy to make for such a great result. They only require a few minutes to create and will give your interior décor a real scary feel. You can find her full blog post here for further instructions, and browse through all her other brilliant craft ideas.

Materials You’ll Need
✔ White large candles
✔ 10 Black carpet tacks per candle
✔ Red candle
Method
Step 1 – Stick tacks on the side of your candle – about half way deep (you can heat them slightly first with a lighter to make them easier to push in).
Step 2 – Light a red candle and let it burn for a couple of minutes.
Step 3 – Drip the red wax onto the sides of the white candle.
Step 4 – Place them on a nice candleholder to make them stand out from the rest.
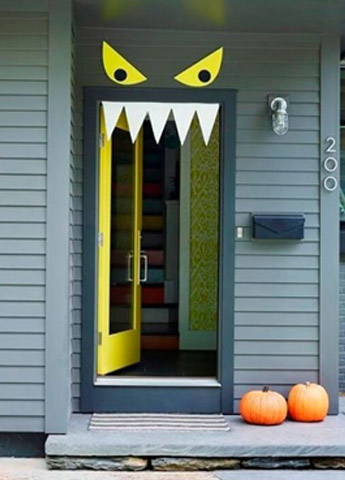
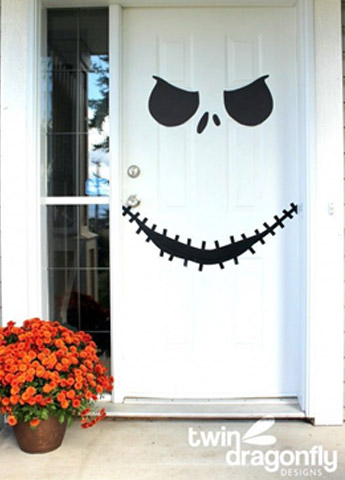
Monster Front Door Décor
Make a spooky door with a monster face décor! A must have to make a great impression and set the tone of how your house will look like inside – and perfect to get as many people as possible knocking at your door on the night!
All you’ll need will be a touch of creativity, cardboard cut outs and double-sided tape. Find a few ideas of shaped and monster faces on Pinterest.
Monster Rocks
If you’re looking for a very easy Halloween craft activity to do with the kids, try making these inexpensive and cute monster rocks by Angela Milnes. They can be placed in the garden, or throughout the house, and moved around daily to surprise the kids everywhere they go.

Materials You’ll Need
✔ Round rocks
✔ Acrylic paint (various bright colours)
✔ Paint brushes
✔ Googly plastic eyes
✔ Strong glue
✔ Sharpie pen
✔ Tipp-Ex
Method
Step 1 – Clean and dry the rocks.
Step 2 – Paint them in various colours (apply a few coats of paint on both sides).
Step 3 – Use a sharpie pen to draw a mouth and eyebrows on each rock.
Step 4 – Glue the eyes.
Step 5 – Draw some funny fangs teeth.
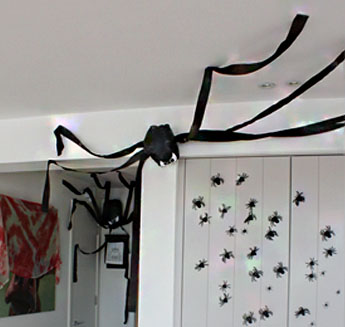
Giant Bin Bag Spider
These giant bin bag spiders are so easy to make for only a few pence each. Plus, they can be assembled from items you probably already have around the home.
Materials You’ll Need
✔ Black bin bag
✔ Bubble wrap
✔ Scrap white paper and black pen
✔ Black crepe paper
✔ Sellotape
Method
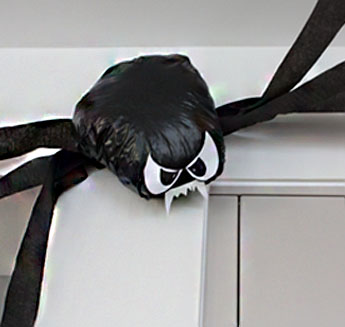
Step 1 – Assemble the ‘body’ of the spider. To do it, bunch up some bubble wrap or other light weight material into a flattish ball, before wrapping with a black bin bag.
Step 2 – Add the spiders face by drawing eyes and fangs with a black marker. You only need A4 printer paper for this, and you can go as happy or scary as you want, depending on the age of the party guests.
Step 3 – Cut 8 strips of crepe paper, each around 3 feet long and 2 inches wide. Secure these to the underside of the spider. This underside will all be hidden against the wall, so it doesn’t matter if they aren’t very neat.
Step 4 – Attach the spider’s body high up on a wall (in a corner works best), and spread the legs in different directions, onto the ceiling and around corners.
To find more detailed instructions and other Halloween party ideas, browse through Diana’s creative DIY ideas at PaintSewGlueChew.com
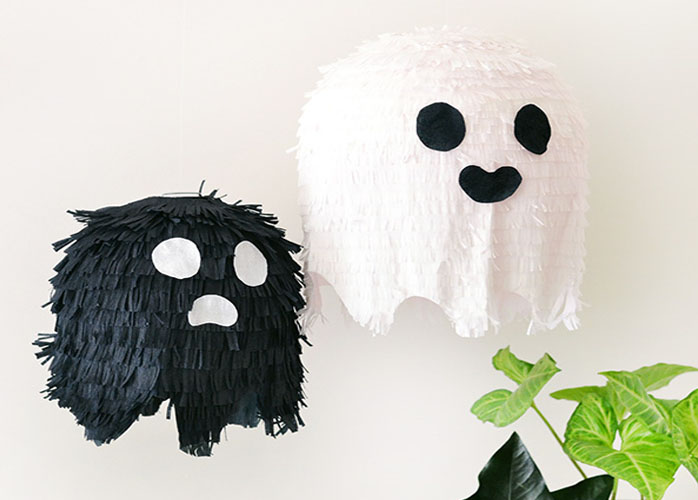
Ghost Pinatas
Instead of handing sweets directly to you your trick or treaters, how about making them earn their treats by creating pinatas? Stephanie, a super creative serial DIYer came up with this wonderful ghost pinatas idea to give to her little nieces.
Materials You’ll Need
✔ Paper lanterns
✔ Black and white crepe paper
✔ Double-sided tape
✔ Regular tape
✔ White cardboard
✔Scissors
✔Sweets
Method
Step 1 – Put the paper lantern together.
Step 2 – Cover the bottom hole with a round piece of white cardboard.
Step 3 – Cut a wide crepe paper to wrap all around the lantern.
Step 4 – Cut some other strips of crepe paper and trim them like a fringe.
Step 5 – Stick double sided tape to the back of your fringe crepe paper strips (overlap the layers as you go).
Step 6 – Cut waves shapes on the bottom.
Step 7 – Stick the piece to the lantern by using double sided tape.
Step 8 – Cover the rest of the lantern with crepe paper fringe strips.
Step 9 – Fill the lantern with sweets by the top hole.
Step 10 – Cover the top hole with a round piece of white cardboard.
Step 11 – Cut a mouth and two eyes in black crepe paper and stick them with double sided tape.
Find further details and step-by-step photos to help you make these cute little Halloween ghosts here.
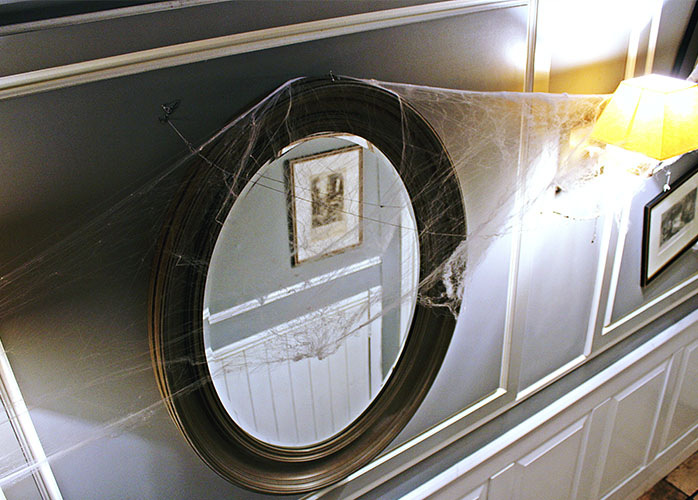
Cover Your Furniture in White Sheets
Lastly, a super-easy one which requires minimal effort. Make an effortlessly eerie living room by simply covering all your furnisher with plain white sheets. You could also hang a fake spider web across all your mirrors to add to the dusty and old feel of an unlived-in spooky house.
We hope these few Halloween ideas have inspired you to make your own décor. To find some extra Halloween accessories, like a spider web tote bag or a set of retro sweets, have a browse in our selection of personalised Halloween gifts.