DIY Baby Photoshoot at Home: How To
Last updated: August 1st, 2024 Published on: August 21, 2020We know how special it is to have photos taken of your little ones to look back at and cherish. Unfortunately, we also know that the cost of a professional baby photoshoot can be pretty high. Never fear, we have created a helpful ‘How To’ guide, for you to take pictures of your bundle of joy from the comfort of your own home!
All you need for your home shoot is a camera or camera phone and some natural lighting. If you want to do a themed shoot or add some decorations, grab any props you’ll need too. When babies are the models it’s always best to keep it simple, to make sure they remain the focal point of the image.
Planning the Photoshoot
Research Ideas
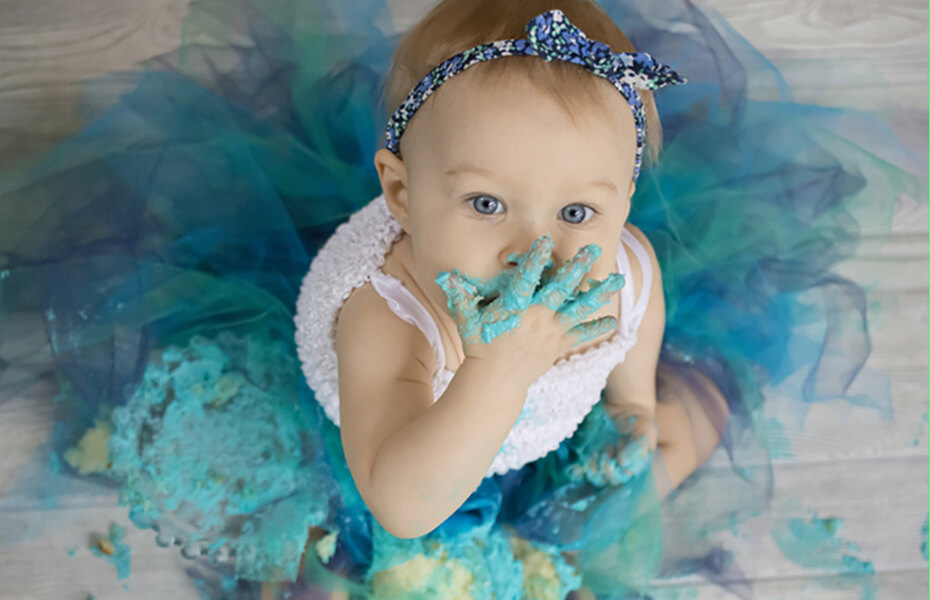
Check out Instagram or Pinterest and browse the poses or angles you like the look of. It’s always helpful to have some inspiration at the ready. One of our favourite baby shoot ideas is a cake smash! Researching other baby photoshoots will help you figure out what will work best in your home or garden.
Find Your Location
Location and timing are super important for a photoshoot, especially when working with natural lighting. There is more natural light in the daytime which makes for better photos. If possible, locate the ‘studio’ near a big window or a sliding door to maximise this. Try to keep the background for the image pretty simple to keep the focus on the little one. Also, if you’re going to take the photos in the garden check the weather forecast!
Prepare Outfits
Try to pre-plan the outfits and looks you wish to shoot, or even write a list! This will help to make sure you have all the props you need at the ready. Set aside the props and clothes a couple of days before to make sure they aren’t misplaced or worn. Pre-planning also prevents the adorable model from being in front of the camera for too long.
Get Yourself a Tripod
Although not a compulsory part of the shoot – purchasing a tripod would be helpful as it keeps the camera still, to prevent blurring. Shooting babies can also be a little chaotic (unless they are sleeping) so you’ll probably find a tripod to be a great addition. You can get some reasonably priced ones online, £15 is an average amount. If you don’t have a tripod, a flat surface can be just as useful such as a table or chair to balance the camera on.
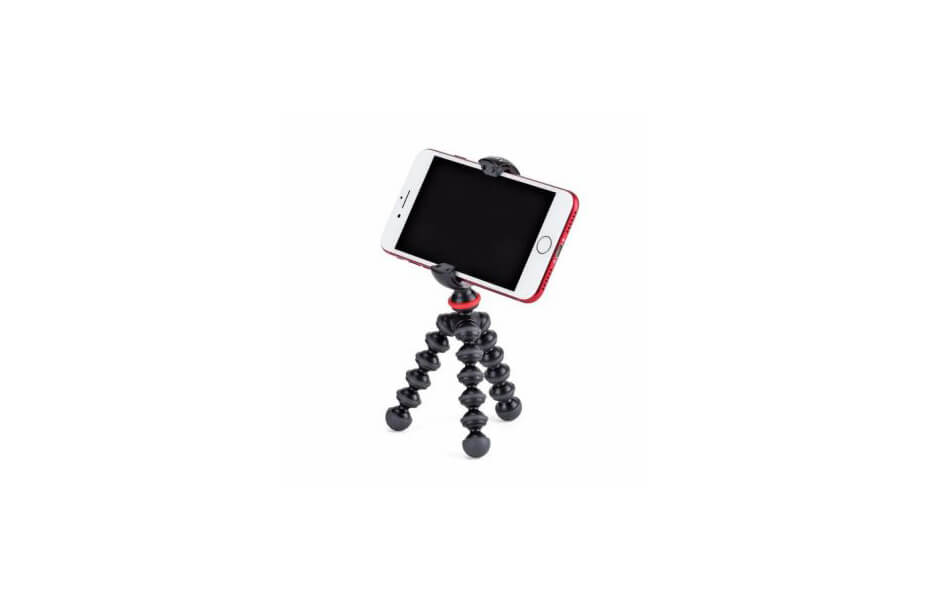
Photo Shoot Tips
Setting Up the ‘Studio’
Clear enough space for the photoshoot to take place and check everything is picture ready. If you’re taking a photo from the floor, grab some blankets or pillows beforehand so the little one will be comfy throughout the shoot. A rolled-up towel under the blanket is a fab way to prop the baby up comfortably and really gives that photoshoot effect.
Check Your Device
Make sure your device has enough charge and that you have memory left. There is nothing more frustrating than getting a ‘low storage’ pop up when you’re taking a photo!
Lighting
Ensure the lighting is perfect by taking some test shots. It can be hard to figure out where shadows will fall or what the photo will look like without testing some angles and camera positionings. Try not to use a flash indoors as this can make for quite a harsh picture. A tip used by professional photographers is to take the photo from above as this lessens shadows and ensures optimal lighting.
Editing Images
Look at the device settings and see if there are any effects or filters you like; a black and white filter can make for a really special photo. Also, try not to use the zoom function as this impacts the image quality. Take the photo without zooming and you can then crop the picture after if needed. It is usually safer to take the images first and to edit the colours and brightness after. This means that you can have a few different options for the pictures you like best.
Timing
The luxury of a home photoshoot is that there is no rush, so you have time to make sure the baby is happy! Pick a time of day where they are not hungry or tired – it also helps to keep them warm. A fed and warm baby is a happy baby, the time between breakfast and lunch should be perfect. This is also when the sun isn’t too bright for those outside shots.
Grab an Assistant
Have an extra pair of hands at the ready. With a DIY photoshoot, you are essentially the photographer, creative director, stylist and client. That’s a lot to take on, so grab a friend or family member to assist you. Having a bit of help means you can have some pictures taken of you and the baby together too.
Dealing with Baby Distractions
Lastly, this is a classic trick used whenever shooting a baby… have their favourite toy at the ready! This is to catch their attention for those shots where you want them to look into the camera. If they can’t see your face because of the device, babies can get distracted. We’ve found that a set of keys also work really great as a baby attention grabber!
![]()
Showcase Your Pictures
Once you’ve finished, why not make the most of your brand new baby images? A popular idea is to create a photo book for the grandparents, make your own canvas print for the wall, or why not send out a photo card to a loved one?
People can then see your adorable baby human and your AMAZING (we hope) photography skills. A DIY baby photoshoot is a memory you can look back at whenever you spot one of the beautiful images around your home.
One More SUPER Important Thing…
Enjoy it! Have fun taking pictures of your little angel and don’t stress too much about getting that perfect shot. The pictures will be even more special because you have dedicated the time to take them.