How to Make Christmas Tree Decorations
Last updated: September 16th, 2021 Published on: November 26, 2019Christmas is coming and so the crafty decorations have already started! Whether you have an artificial Christmas tree waiting in the attic or go to the local Christmas tree farm, it’s never too early to get crafty and think about which homemade decorations you could make this year.
So, don’t just dust off your old Christmas tree décor, but instead, get inspired by some of our favourite easy to make ideas. Trialled and tested at Funky HQ, see below a step by step guide to a variety of ideas!

DIY Dried Citrus Ornaments
Add an organic, natural feel to your tree, and citrusy smell around the house by making your own lemon or orange ornaments. All you need are citrus fruits of your choice – whether it’s lemons, oranges, blood oranges, or grapefruits – parchment paper, cookie sheets, twine, and a skewer.

Instructions:
1. Preheat oven to 250°F.
2. Cut oranges crosswise into 1/4-inch slices.
3. Line cookie sheets with parchment paper. Pat orange slices dry with paper towels and place them on cookie sheets in a single layer.
4. Bake for approximately three hours or until dry. (To ensure the slices dry flat, turn them over at the midway mark.) Remove from oven.
5. Using a skewer, poke two holes into the top of each orange slice.
6. Thread twine through each hole.
DIY Rudolph Wood Ornaments
Make your own cute Rudolf faces from wooden slices. It’s a super easy idea from Angela, mummy blogger at theinspirationedit.com, which can be used as gift toppers too! You’ll only need brown glitter paper, red glitter paper, string, a glue gun, a black marker, brown paint and a couple of brushes.
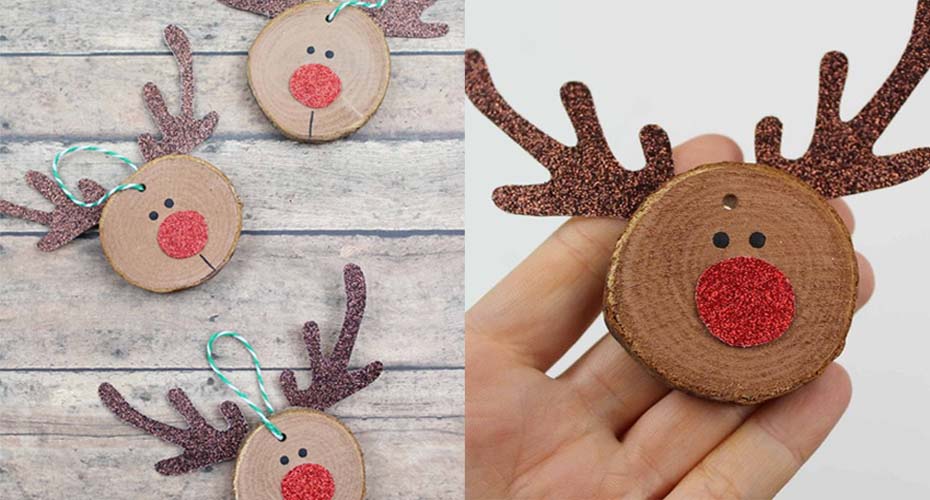
Instructions:
1. Using your glue gun, glue the brown glitter antlers to the back of your wooden slice.
2. Glue the red nose onto the bottom half of the wood slice and draw two eyes with your black marker pen.
3. Draw a line under Rudolf’s nose to give him a mouth.
4. Thread a piece of string through the hole on your wooden slice.
5. Your Rudolf Christmas craft is now ready!
Soft Fabric Shapes
Experiment with different colours, shapes and patterns with these simple to sew decorations. You’ll need a selection of fabric, ribbons and buttons, soft toy filling and a needle and thread. You’ll find a lot of these things around the house, you may just need to buy the toy filling and some Christmassy fabric from a craft shop. You could also use recycled fabric if you have some old clothes with fun patterns on them!
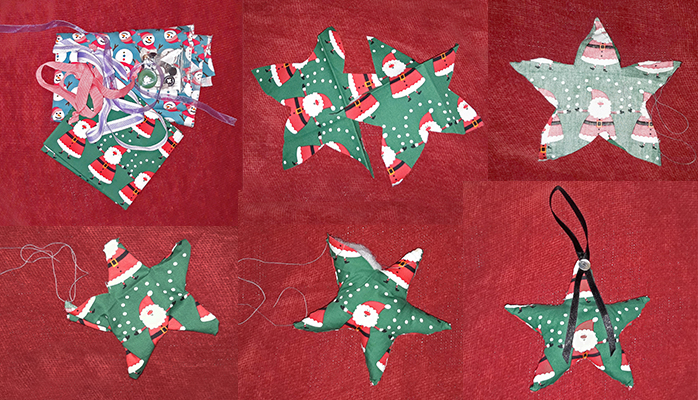
Instructions:
1. Draw a shape on the back of a piece of fabric, cut it out and use it to draw around on another piece of fabric to give you two matching shapes. Some ideas for simple shapes: a heart, star, stocking, tree, angel.
2. Sew the pieces together around the edge, with the pattern facing inwards. Leave a small gap so it can be turned inside out.
3. Turn it inside out and stuff with the toy filling, leaving the end of the thread poking out.
4. Sew up the gap and attach a ribbon. Choose a button and sew it on to cover where the ribbon joins.
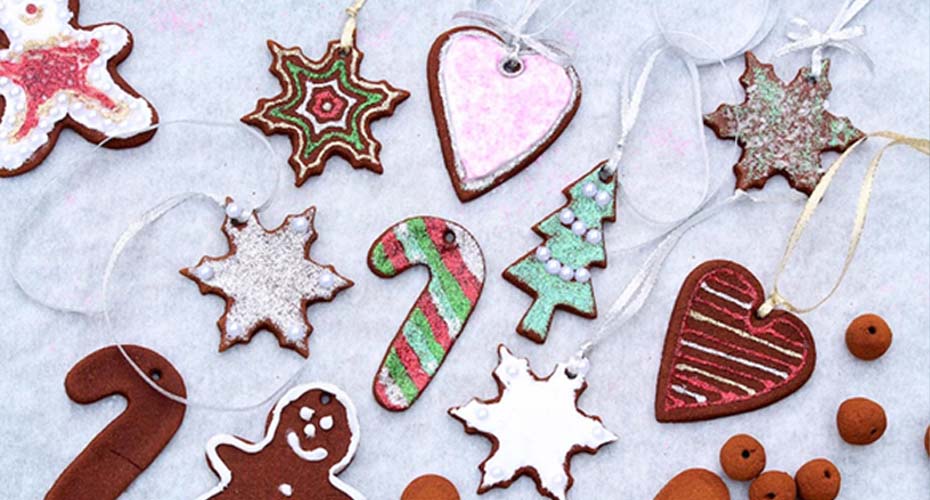
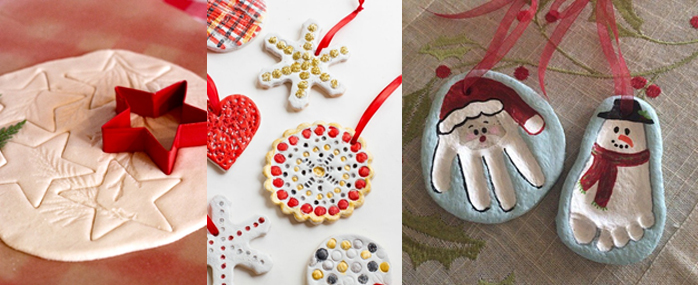
DIY Cinnamon Ornaments
A creative cinnamon craft – perfect for a great smell around the house. This next idea is an easy to make an ornament that uses pantry and household items to create a dough, which is rolled out and cut into a variety of shapes and sizes.
The shapes dry hard, aren’t edible but omit a wonderful smell around the house.
For this recipe, you will need the below ingredients:
• 3/4 cup (6 ounces) of apple sauce (plus a few tablespoons as needed).
• 1 (4-ounce) container of ground cinnamon (or about 1 cup).
• 2 tablespoons (30 grams) of white liquid glue (such as Elmer’s glue).
• Twine or ribbon for hanging.
• Straw, skewer, pencil or piping tip to make a hole.
• Royal icing, glitter glue, small beads, etc., for decorating.
Instructions:
1. Mix together the apple sauce, ground cinnamon, and glue. Add a little more apple sauce if needed to form a soft dough.
2. Roll out the dough between two pieces of parchment paper to approximately 3/8-inch thickness.
3. Cut into desired shapes with cookie cutters. Use a straw, skewers, a piping tip or pencil to punch a hole near the top of the ornament for a ribbon.
4. Place the ornaments on a parchment-lined baking sheet. As I transfer them, I use my finger to soften any rough edges. Let them air dry for three to four days, flipping it once a day.
5. Once dry, decorate with sharpie pens, glitter, coloured icing, beads, and pearls, then insert a ribbon or twine through the hole for hanging.
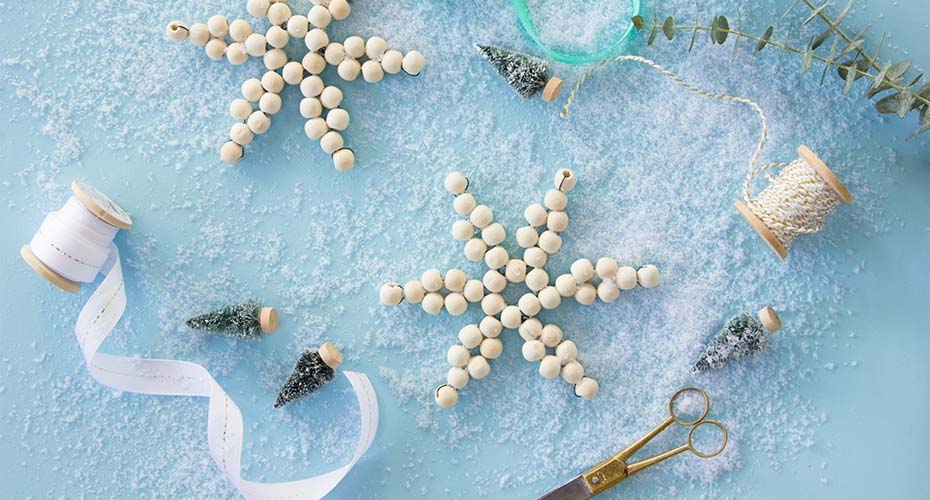
DIY Wood Bead Snowflake Ornament
Make your own snowflake ornaments with these monochromatic, twine and wooden beads. They will give a natural look and feel to any home, whether you choose to paint them to match your home interior colours or not. Follow this simple step by step guide from Alice & Lois at twin sisters to make these Scandinavian looking inspired ornaments.
Salt Dough Ornaments
Salt dough ornaments are a classic craft that your kids will love to make, which will bring back some classic childhood memories for parents. Also super easy to make, they only require three ingredients: flour, salt and water.
Instructions:
1. Simply combine four cups of all-purpose flour, one cup of salt, and 1 1/2 cups of warm water in a mixing bowl, and blend until smooth.
2. Roll out dough and cut desired shapes.
3. Use a straw to poke a hole for hanging and bake at 150°C until dry, approximately 1 hour; then cool completely.
4. Decorate with paint, glue beads, pearls or glitter, or draw small eyes and mouths with coloured sharpie pens.
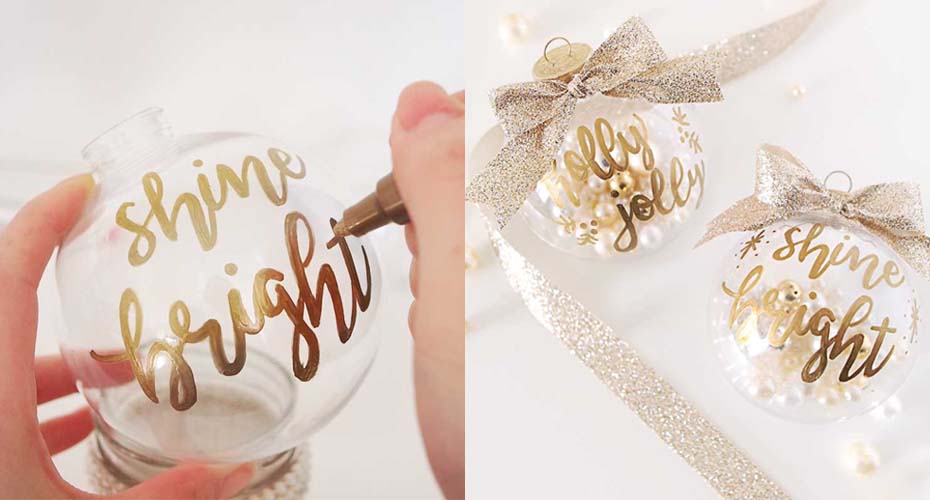
Gold Hand-Lettered Ornaments
A lovely DIY Christmas bauble to hang on the tree or to send to someone special by customising with their hand-written name or favourite catchphrase.
These super cute gold hand-written pearl baubles are shared by Lorita, a graphic designer and blogger of Ting and Things. You will only need a gold sharpie pen, plastic or gold baubles, gold ribbon and pearls.
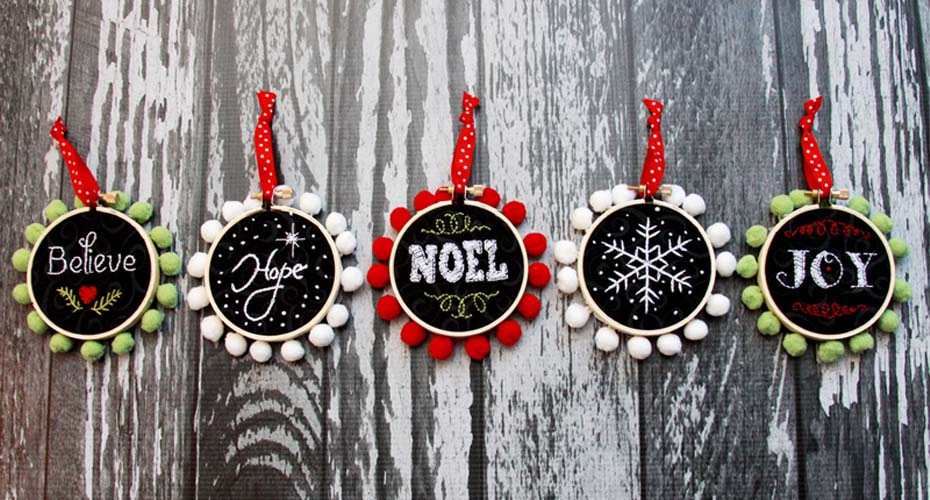
Embroidery Hoop Pom-Pom Christmas Ornaments
Even the most basic cross stitchers can nail this easy Christmas craft and ornament project. If you want to skip the sewing altogether, use festive fabric in lieu of the black cloth. Your ornament will look just as cute! Get the tutorial by Mandy, a US craft and busy blogger mum at Sugar Bee Crafts.
Upcycled CD Christmas Ornaments
Remember CDs? We all have some old scratched or broken CDs somewhere around the house. Probably getting dusty in a forgotten corner, you can bring them back to life and create an adorning set of shining baubles! All you need is any old bauble, small pieces of a CD, ribbon, and a glue gun.
To find a step by step guide, watch Crème de la Craft video below to make it yourself in no time!
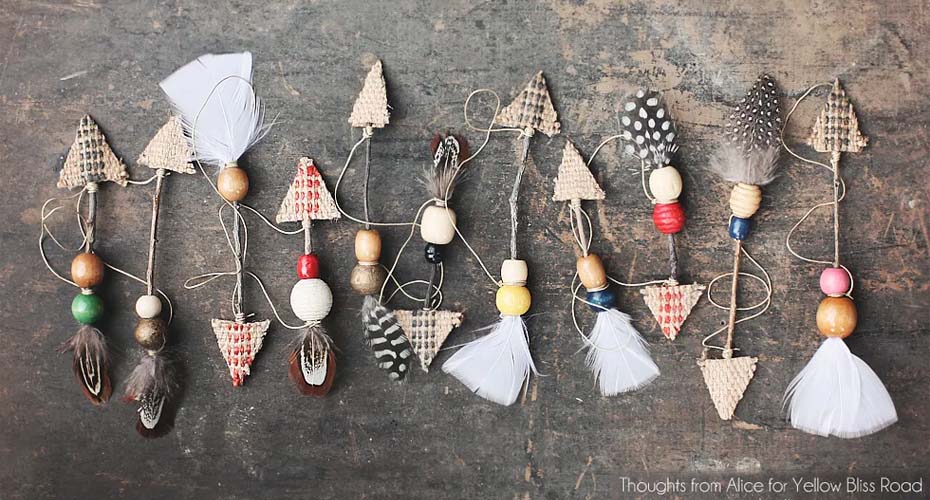
Rustic Boho Twig Arrows
For all bohemian style lovers, we have found another simple and cute idea for homemade ornaments. Using several five-inch thin twigs, small and delicate feathers and colourful wooden beads, it’s easy to create these unique arrows ornaments. Find Alice Wingerden’s full tutorial at Thoughts From Alice.
We hope these ideas have given you some inspiration and provided you with enough guidance to feel like you can also make your own Christmas tree decorations.
If you’d like to personalise more traditional Christmas ornaments, like baubles or snow globes, create your own Christmas decorations online here.